Initial setup
Plugging in your Raspberry Pi
Before you plug anything into your Raspberry Pi, make sure that you have all the equipment listed above to hand. Then follow these instructions:
- Begin by slotting your microSD card into the microSD card slot on the Raspberry Pi, which will only fit one way.
- Next, plug in your USB keyboard into the USB slots on the Raspberry Pi.
- Make sure that your monitor or TV is turned on and that you have selected the right input (e.g. HDMI 1, DVI, etc).
- Then connect your HDMI cable from your Raspberry Pi to your monitor or TV.
- If you intend to connect your Raspberry Pi to the Internet, plug in an ethernet cable into the ethernet port next to the USB ports, otherwise skip this step.
- When you are happy that you have plugged in all the cables and microSD card required, finally plug in the micro USB power supply. This action will turn on and boot your Raspberry Pi.
Logging into your Raspberry Pi
Once your Raspberry Pi has completed the boot process, a login prompt will appear. The default login for Raspbian is username pi with the password raspberry. Note you will not see any writing appear when you type the password. This is a security feature in Linux.
After you have successfully logged in, you will see the command line prompt pi@raspberrypi~$

Rasbian configuration tool
Once you succesfully log in the Raspberry, start the rasbian configuration tool:
sudo raspi-config
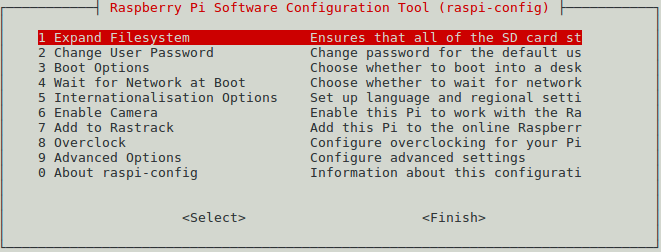
And make the following configurations:
Re-size (expand) the file-system to use the entire SD card
Internationalisation option
- Change the locale to match your location
- Change the timezone to match your location
In the Advanced options
- Enable the SSH server
- Change the hostname
Change the root password
sudo passwd
Change the password of the pi user
passwd
Update repositories
sudo apt-get update